
Recipe #8
Bread and Butter
Two age-old, artisanal products that have been gracing our plates for centuries. Bread and butter (being eaten) together can be traced back to 1492—a solid partnership ☺. All it needs is a good organic flour, warm water and time.
The first breads I remember baking was when I was 7 or 8 after my mother gifted me a cookbook for kids. I quickly started baking Quarkbrötchen (quark buns) for our family breakfast table on a regular basis. After trying out all different kinds of doughs I started baking with sourdough just a few years ago.
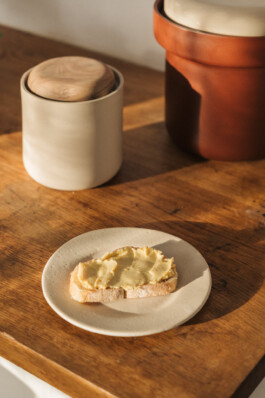
Here you can find two recipes, a simple and delicious flat bread recipe from my mother and a more attention-needing sourdough bread. Sourdough is naturally fermented, involving bacteria and wild yeasts that are present everywhere, in the environment, in the air, on our hands and on the grain itself. I like to eat it plain, with butter and some radish cress.
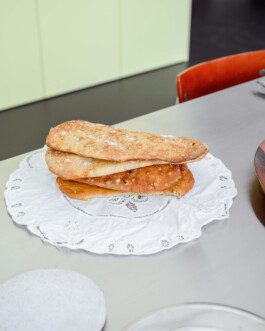
RECIPE 01: SIMPLE FLAT BREAD
You can start with this easy recipe that I got from my mother, while you wait for your sourdough starter to be ready, this will take about a week. Once you have your active starter you can replace the yeast here with your wild yeast. Prepare the dough the evening before you want to bake it.
INGREDIENTS
150 g whole grain wheat flour
150 ml warm water
a pinch of dry yeast
PREPARATION
1. Blend everything together and let it rest overnight. When using fresh yeast, let it first sit in the warm (not hot) water for 10 minutes before mixing with the flour.
Note:
2 packages of dry yeast (à 7 grams, 14 grams in total) correspond to one fresh yeast cube (42 grams). 42 grams of fresh yeast correspond to 200 grams of active sourdough.
2. Now mix:
400 g of whole grain wheat flour (you can also add and blend different kinds of flour like rye or spelt)
300 ml warm water
a pinch of sugar
a teaspoon of salt
1/4 teaspoon of dry yeast (about 1.5 grams)
3. Work the dough until everything is smooth and well combined. Cover and let it rest for 1–2 hours.
4. Then sprinkle the dough with flour and fold twice. Separate in two and put on a baking sheet. Cover with a clean kitchen towel and let it rest for another half an hour
5. Meanwhile let the oven preheat onto 220°C. Tap the buddy with a little flour and bake for about 40 minutes until tawny and crispy.
Enjoy!

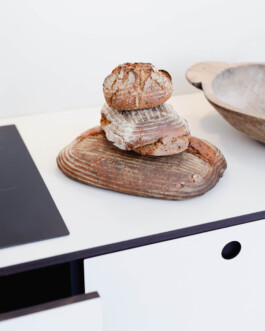
RECIPE 02: SOURDOUGH BREAD
The first time you bake with a sourdough you need to start a week in advance with the starter consisting of water and flour and from there feed it every day ↗ see here how to make it before you start preparing the dough for your bread.
INGREDIENTS
30 g active sourdough*
1000 g organic flour, you can try out various flour compositions. I like to use: 500 grams wheat flour (mostly Type 550), 100 grams whole wheat flour, 300 grams rye flour (Type 1150) and 100 grams spelt flour (Type 1050)
600 ml water, slightly warmer than room temperature ≈28°C
20 g salt
PREPARATION
If you want to bake your bread for the weekend, just take out your starter of the fridge on a Thursday evening. Take 20g and refresh it with 100ml water and 100g flour. Repeat on the next day so you can start with your dough on Saturday morning and then bake it on Sunday.
Saturday morning:
Take 30 grams of your active sourdough starter that you’ve prepared before. Now add 100ml of warm water to the bowl and whisk.
Note:
The exact amount of water is based on your particular flour and environment—slowly and gradually add water to your dough the first few bakes.
Slowly add 100 grams of flour and thoroughly mix with a fork. Cover and let it rest at room temperature until noon.
Note:
Yeast does not like direct sun light and also no wind, try not to place near windows or open doors.
At noon continue with the autolyse. Mix 900 grams of flour and 600ml of water in a bowl. Then cover and let it rest next to your starter for 1 hour. This simple pause will lead to a few changes in your dough, gluten bonding, flavor development and elasticity. A good pause for a little nap.
After the rest: add 50ml of water, slowly, then salt and the starter to your dough. Now knead the dough for about a minute. Then cover it with a clean kitchen towel and let it rest for another 30 minutes.
Bulk fermentation: The first rise.
Stretch and fold your dough, at least 5 times. Then let it rest again for another 4–6 hours, at room temperature. Stretch and fold your dough every hour. In warmer summer months this part will go a little faster. The dough should double in that time, with a few bubbles on top.
Sprinkle your working surface with some flour. Let the dough rest here for about 15 minutes. Then knead it for 10 mins until soft and elastic. Carefully roll and move around your dough and then place it into a wooden proofing basket with with linen fabric (or just sprinkle with flour if you don’t have a basket). Let the dough sit there for another 2 hours or put it in the fridge overnight so you can bake it the next morning.
Then preheat the oven to 250°C. When ready, flip your dough out gently into a lightly oiled casserole (or on a sheet of baking paper). Sprinkle it lightly with water, then cover with a lid and bake for 20 minutes. It’s helpful to have a little water tray at the bottom of your oven during the first 20 minutes. Then remove the lid, turn the heat down to 220°C and bake for 30 more minutes. The crust will turn crispy and golden-brown. Finally you can put the casserole with your bread out of the oven and let it cool down for an hour, until you can try it. Every single bake is different, no matter how precise and consistent you try to be. Everything, the crust, colour, smell and texture of your freshly baked bread. But that’s also part of the beauty of the whole process. Enjoy!
Note:
You can always freeze your bread if you think you won’t eat everything in a week. After baking it for a few minutes it will be crispy again and still taste great.
*Active Sourdough Starter
All you need for your starter is water and flour. Not complicated at all, but needs some time and care, since you will have to feed it every day. After a week the active sourdough starter will be ready to be used and/or to be stored in an airtight jar in the refrigerator. The remaining starter in the refrigerator needs to be maintained and fed every week.
Sometimes you can ask at a bakery that works with good, organic ingredients, if you can have some of their sourdough to start with.
INGREDIENTS
Day 1 and 2
50 g of organic whole grain rye flour (you can also go with whole grain wheat flour)
50 ml warm water (≈38°C, the water should never be hot)
PREPARATION
Measure the flour and water and mix them in a glass jar with a fork, until you have a smooth, thick paste. Cover your starter and let it rest at room temperature for 24 hours. Then discard half of it and refresh it with flour and water again.
Day 3, 4, 5, 6 & 7 — continue feeding the starter with:
100 g whole grain flour
100 ml water (≈38°C)
Discard all but half of your starter prior to feeding it, each time. Don’t throw it away, you can use it for plenty of other wonderful dishes. Feed the starter with fresh water and flour, day by day, a little more. On the second or third day bubbles will appear on the surface and you will sense a little yeasty and acidic, sour smell. Depending on the climate and how active your starter is, you may need to start to feed it more often, always when it has metabolized all the flour from the last feeding. It will then start sinking down and getting more liquid. Don‘t feed it before its ready (bubbles on top, more liquid), overfeeding would make it more lethargic and less active. Later add up to a 100 g flour and 100 ml water to the remaining starter and let it rest for another day. Then repeat the whole procedure on the next day and so on (the time intervals will get smaller and smaller).
Note:
A sourdough starter needs fresh flour and water each day (or each week when kept in the fridge). That also means you will have a discard on a regular basis. This helps keeping the acidity level low in your sourdough culture. Save the discard in the fridge and use it for focaccia, brioche, galettes, pancakes or waffles.
On the 7th day your starter is ready to be used. You can use a third of it to make a bread (or focaccia, pizza, brioche, … the options seem endless) and put the rest of it in a clean jar with a lid into the refrigerator.
Maintaining the starter
From there on refresh your starter at least once a week, reserving 50 g of the starter (and instead of discarding the rest you can try new recipes with it or give it away to someone who can start making a new culture with it). Then keep on feeding it with 50 g of whole grain flour and 50 ml water. Let it rest for 12 hours at room temperature and then put it back into the fridge. In case you forget to feed it in a week or two, feed it a little more often in a row (2–3 times the upcoming week), it should be fine again.
Notes:
Take some of the starter from the refrigerator 6–12 hours before you want to start making the dough and feed it with 100 g of flour and 100 ml of water.
The starter is the naturally fermented wild yeast out of flour and water that you’ll have to keep on refreshing on a regular basis. The levain (preferment) is the small part of your starter that will be mixed in with your dough and later baked. When it's mixed with salt and flour and the dough put aside to rest and rise this step is called bulk fermentation. The proof is the final rise of the dough before baking, after stretching and dividing the it.
The speed of your dough growth depends on your room temperature. About 28°C is good. The wild yeasts in the dough metabolize sugars and produce alcohol, CO₂ and distinct flavour compounds.
For every 8°C increase in room temperature, the rising time of your dough is twice as fast. Vice versa it is also twice as slow for every the same decrease in temperature. If your dough takes one hour to rise at 25°C, it will take around 2 hours at 17°C.
You can always mix different flours—the more, the merrier—this will add different kinds of wild yeasts. Try to use organic whole grain bread flour, since conventional flours are usually overly processed.
Note:
100 grams of active sourdough (wild yeast) = 7 grams of dry yeast = 21 grams of fresh yeast (half yeast cube)
BACKGROUND
Cereals (and later bread) became a staple food during the Neolithic, around 10.000 years ago. Wheat and barley were one of the first domesticated plants in the “Fertile Crescent”, the region of Mesopotamia that was home to some of the earliest human civilizations, the “Cradle of Civilization”.
The earliest recorded bread was made around 8000 BC, in Egypt. When people started domesticating their plants all kinds of breads were made. The composition of ingredients varied as much as the way it was made but it became an important food to all cultures. In different parts of the world different cereals were domesticated such as sorghum in sub–Saharan Africa, rice in East Asia and corn in Abya Yala (the pre colonial term for America, as used by most Indigenous peoples, I recommend reading about it for example in Sinthujan Varatharajah’s book »an alle orte, die hinter uns liegen« on colonialist pasts and presents).
BUTTER
INGREDIENTS
240ml cream (you can also try this with oat cream)
cold water
optional: herbs, lemon zest or miso
PREPARATION
Recipe #8
Bread and Butter
Two age-old, artisanal products that have been gracing our plates for centuries. Bread and butter (being eaten) together can be traced back to 1492—a solid partnership ☺. All it needs is a good organic flour, warm water and time.
The first breads I remember baking was when I was 7 or 8 after my mother gifted me a cookbook for kids. I quickly started baking Quarkbrötchen (quark buns) for our family breakfast table on a regular basis. After trying out all different kinds of doughs I started baking with sourdough just a few years ago.
Here you can find two recipes, a simple and delicious flat bread recipe from my mother and a more attention-needing sourdough bread. Sourdough is naturally fermented, involving bacteria and wild yeasts that are present everywhere, in the environment, in the air, on our hands and on the grain itself. I like to eat it plain, with butter and some radish cress.
RECIPE 01: SIMPLE FLAT BREAD
You can start with this easy recipe that I got from my mother, while you wait for your sourdough starter to be ready, this will take about a week. Once you have your active starter you can replace the yeast here with your wild yeast. Prepare the dough the evening before you want to bake it.
INGREDIENTS
150 g whole grain wheat flour
150 ml warm water
a pinch of dry yeast
PREPARATION
1. Blend everything together and let it rest overnight. When using fresh yeast, let it first sit in the warm (not hot) water for 10 minutes before mixing with the flour.
Note:
2 packages of dry yeast (à 7 grams, 14 grams in total) correspond to one fresh yeast cube (42 grams). 42 grams of fresh yeast correspond to 200 grams of active sourdough.
2. Now mix:
400 g of whole grain wheat flour (you can also add and blend different kinds of flour like rye or spelt)
300 ml warm water
a pinch of sugar
a teaspoon of salt
1/4 teaspoon of dry yeast (about 1.5 grams)
3. Work the dough until everything is smooth and well combined. Cover and let it rest for 1–2 hours.
4. Then sprinkle the dough with flour and fold twice. Separate in two and put on a baking sheet. Cover with a clean kitchen towel and let it rest for another half an hour
5. Meanwhile let the oven preheat onto 220°C. Tap the buddy with a little flour and bake for about 40 minutes until tawny and crispy.
Enjoy!
RECIPE 02: SOURDOUGH BREAD
The first time you bake with a sourdough you need to start a week in advance with the starter consisting of water and flour and from there feed it every day ↗ see here how to make it before you start preparing the dough for your bread.
INGREDIENTS
30 g active sourdough*
1000 g organic flour, you can try out various flour compositions. I like to use: 500 grams wheat flour (mostly Type 550), 100 grams whole wheat flour, 300 grams rye flour (Type 1150) and 100 grams spelt flour (Type 1050)
600 ml water, slightly warmer than room temperature ≈28°C
20 g salt
PREPARATION
If you want to bake your bread for the weekend, just take out your starter of the fridge on a Thursday evening. Take 20g and refresh it with 100ml water and 100g flour. Repeat on the next day so you can start with your dough on Saturday morning and then bake it on Sunday.
Saturday morning:
Take 30 grams of your active sourdough starter that you’ve prepared before. Now add 100ml of warm water to the bowl and whisk.
Note:
The exact amount of water is based on your particular flour and environment—slowly and gradually add water to your dough the first few bakes.
Slowly add 100 grams of flour and thoroughly mix with a fork. Cover and let it rest at room temperature until noon.
Note:
Yeast does not like direct sun light and also no wind, try not to place near windows or open doors.
At noon continue with the autolyse. Mix 900 grams of flour and 600ml of water in a bowl. Then cover and let it rest next to your starter for 1 hour. This simple pause will lead to a few changes in your dough, gluten bonding, flavor development and elasticity. A good pause for a little nap.
After the rest: add 50ml of water, slowly, then salt and the starter to your dough. Now knead the dough for about a minute. Then cover it with a clean kitchen towel and let it rest for another 30 minutes.
Bulk fermentation: The first rise.
Stretch and fold your dough, at least 5 times. Then let it rest again for another 4–6 hours, at room temperature. Stretch and fold your dough every hour. In warmer summer months this part will go a little faster. The dough should double in that time, with a few bubbles on top.
Sprinkle your working surface with some flour. Let the dough rest here for about 15 minutes. Then knead it for 10 mins until soft and elastic. Carefully roll and move around your dough and then place it into a wooden proofing basket with with linen fabric (or just sprinkle with flour if you don’t have a basket). Let the dough sit there for another 2 hours or put it in the fridge overnight so you can bake it the next morning.
Then preheat the oven to 250°C. When ready, flip your dough out gently into a lightly oiled casserole (or on a sheet of baking paper). Sprinkle it lightly with water, then cover with a lid and bake for 20 minutes. It’s helpful to have a little water tray at the bottom of your oven during the first 20 minutes. Then remove the lid, turn the heat down to 220°C and bake for 30 more minutes. The crust will turn crispy and golden-brown. Finally you can put the casserole with your bread out of the oven and let it cool down for an hour, until you can try it. Every single bake is different, no matter how precise and consistent you try to be. Everything, the crust, colour, smell and texture of your freshly baked bread. But that’s also part of the beauty of the whole process. Enjoy!
Note:
You can always freeze your bread if you think you won’t eat everything in a week. After baking it for a few minutes it will be crispy again and still taste great.
*Active Sourdough Starter
All you need for your starter is water and flour. Not complicated at all, but needs some time and care, since you will have to feed it every day. After a week the active sourdough starter will be ready to be used and/or to be stored in an airtight jar in the refrigerator. The remaining starter in the refrigerator needs to be maintained and fed every week.
Sometimes you can ask at a bakery that works with good, organic ingredients, if you can have some of their sourdough to start with.
INGREDIENTS
Day 1 and 2
50 g of organic whole grain rye flour (you can also go with whole grain wheat flour)
50 ml warm water (≈38°C, the water should never be hot)
PREPARATION
Measure the flour and water and mix them in a glass jar with a fork, until you have a smooth, thick paste. Cover your starter and let it rest at room temperature for 24 hours. Then discard half of it and refresh it with flour and water again.
Day 3, 4, 5, 6 & 7 — continue feeding the starter with:
100 g whole grain flour
100 ml water (≈38°C)
Discard all but half of your starter prior to feeding it, each time. Don’t throw it away, you can use it for plenty of other wonderful dishes. Feed the starter with fresh water and flour, day by day, a little more. On the second or third day bubbles will appear on the surface and you will sense a little yeasty and acidic, sour smell. Depending on the climate and how active your starter is, you may need to start to feed it more often, always when it has metabolized all the flour from the last feeding. It will then start sinking down and getting more liquid. Don‘t feed it before its ready (bubbles on top, more liquid), overfeeding would make it more lethargic and less active. Later add up to a 100 g flour and 100 ml water to the remaining starter and let it rest for another day. Then repeat the whole procedure on the next day and so on (the time intervals will get smaller and smaller).
Note:
A sourdough starter needs fresh flour and water each day (or each week when kept in the fridge). That also means you will have a discard on a regular basis. This helps keeping the acidity level low in your sourdough culture. Save the discard in the fridge and use it for focaccia, brioche, galettes, pancakes or waffles.
On the 7th day your starter is ready to be used. You can use a third of it to make a bread (or focaccia, pizza, brioche, … the options seem endless) and put the rest of it in a clean jar with a lid into the refrigerator.
Maintaining the starter
From there on refresh your starter at least once a week, reserving 50 g of the starter (and instead of discarding the rest you can try new recipes with it or give it away to someone who can start making a new culture with it). Then keep on feeding it with 50 g of whole grain flour and 50 ml water. Let it rest for 12 hours at room temperature and then put it back into the fridge. In case you forget to feed it in a week or two, feed it a little more often in a row (2–3 times the upcoming week), it should be fine again.
Notes:
Take some of the starter from the refrigerator 6–12 hours before you want to start making the dough and feed it with 100 g of flour and 100 ml of water.
The starter is the naturally fermented wild yeast out of flour and water that you’ll have to keep on refreshing on a regular basis. The levain (preferment) is the small part of your starter that will be mixed in with your dough and later baked. When it's mixed with salt and flour and the dough put aside to rest and rise this step is called bulk fermentation. The proof is the final rise of the dough before baking, after stretching and dividing the it.
The speed of your dough growth depends on your room temperature. About 28°C is good. The wild yeasts in the dough metabolize sugars and produce alcohol, CO₂ and distinct flavour compounds.
For every 8°C increase in room temperature, the rising time of your dough is twice as fast. Vice versa it is also twice as slow for every the same decrease in temperature. If your dough takes one hour to rise at 25°C, it will take around 2 hours at 17°C.
You can always mix different flours—the more, the merrier—this will add different kinds of wild yeasts. Try to use organic whole grain bread flour, since conventional flours are usually overly processed.
Note:
100 grams of active sourdough (wild yeast) = 7 grams of dry yeast = 21 grams of fresh yeast (half yeast cube)
BACKGROUND
Cereals (and later bread) became a staple food during the Neolithic, around 10.000 years ago. Wheat and barley were one of the first domesticated plants in the “Fertile Crescent”, the region of Mesopotamia that was home to some of the earliest human civilizations, the “Cradle of Civilization”.
The earliest recorded bread was made around 8000 BC, in Egypt. When people started domesticating their plants all kinds of breads were made. The composition of ingredients varied as much as the way it was made but it became an important food to all cultures. In different parts of the world different cereals were domesticated such as sorghum in sub–Saharan Africa, rice in East Asia and corn in Abya Yala (the pre colonial term for America, as used by most Indigenous peoples, I recommend reading about it for example in Sinthujan Varatharajah’s book »an alle orte, die hinter uns liegen« on colonialist pasts and presents).
a pinch of salt
c/o Tamara Pešić
Ludwigstraße 197
63067 Offenbach
Germany
Pick up & drop times:
Wed, 16:00–19:00
Sat, 13:00–16:00

© Copyright 2022
a pinch of salt
c/o Tamara Pešić
Ludwigstraße 197
63067 Offenbach
Germany
Pick up & drop times:
Wed, 16:00–19:00
Sat, 13:00–16:00
© Copyright 2022